To Listen While On-The-Go
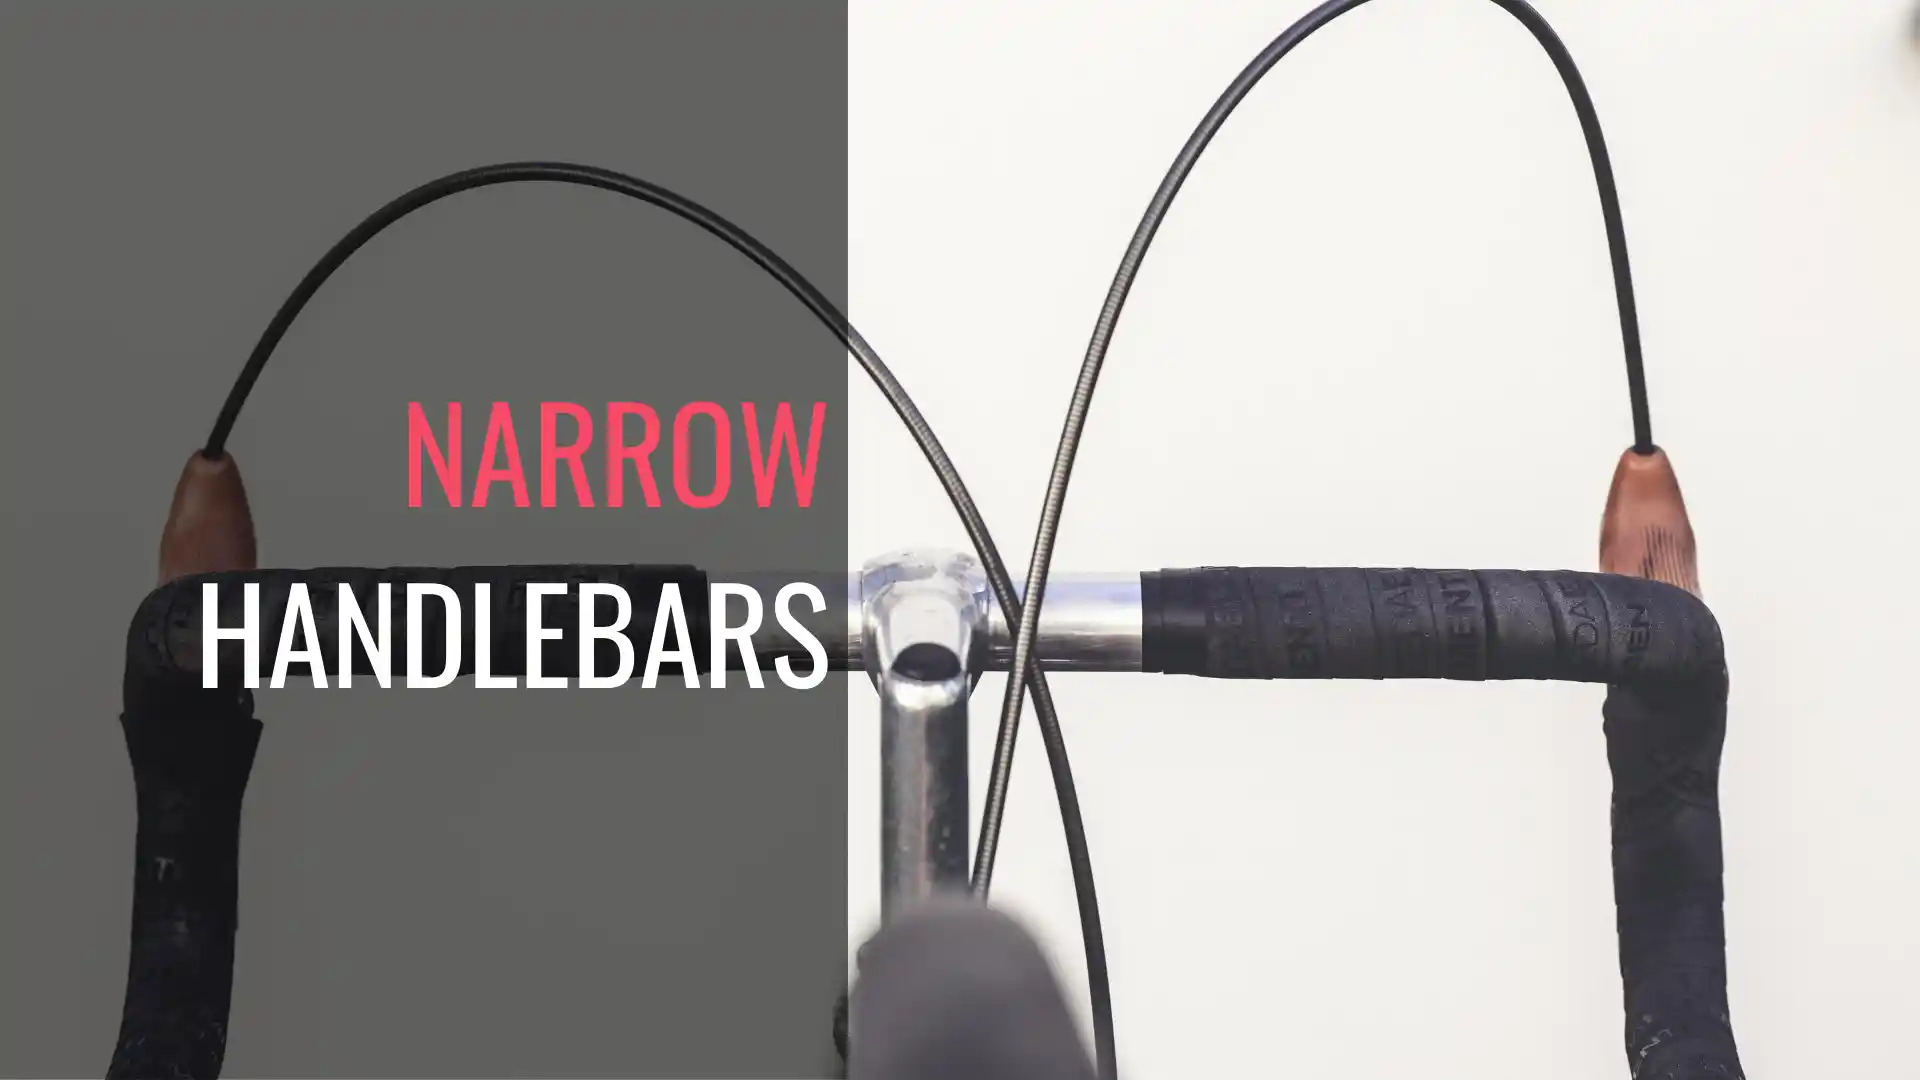
The professional peloton is currently undergoing a radical ergonomic transformation about handlebars, trading the traditional “shoulder-width” standard for a narrow handlebar that is between 36cm and 38cm. This shift is driven by a modern understanding of fluid dynamics, where reducing a rider’s frontal surface area is recognized as the most cost-effective way to save significant wattage at high speeds. What was once a standard 42-44cm cockpit has become a sea of 36-38cm bars, even on riders who would have been considered “too tall” for narrow setups just five years ago.
While once considered a niche setup for track specialists, the move toward narrower bars—and the tactical use of “flared” drops—represents a fundamental change in how cyclists balance aerodynamic efficiency, biomechanical stability, and handling control. In this post we see the advantages, limitation, and how to size-down for maximum efficiency.
Table of Contents
Why Pros Are Moving to 36mm and 38mm Bars
For decades, the rule of thumb was to match handlebar width to the width of your shoulder bones (acromion processes). However, aerodynamics has fundamentally changed that logic. The following are some practical considerations that were taken into effect for moving to narrower bars –
Frontal area reduction and watt savings
The shift to narrower bars in the pro peloton is driven by measurable aerodynamic gains.
The primary enemy of a cyclist is wind resistance ($F_d$), which is heavily influenced by the frontal surface area ($A$). Wind tunnel testing shows:
- Frontal area reduction: Each 2cm reduction in bar width decreases frontal area by approximately 1-2%
- The Math:
- CdA (coefficient of drag x frontal area) improvements are most significant when riders can maintain proper position
- By narrowing your bars by just 4cm, you pull your elbows and shoulders inward. This significantly reduces your coefficient of drag.
- Watt savings: At 40km/h, moving from 42cm to 38cm bars can save 3-5 watts, with savings increasing exponentially at higher speeds
Real-world impact: At professional speeds (45+ km/h), switching from 42cm to 36cm bars can save between 5 to 10 watts. In a sport won by millimeters, that is a massive “free” gain.
The UCI’s 2021 position rule changes made narrow bars more attractive since riders needed to optimize every other aero element
Wind tunnel data from Specialized, Trek, and Swiss Side consistently show 36-38cm as the sweet spot for most riders between 165 – 180cm tall

The Biomechanics of Narrower Shoulders
Tricep engagement and "aero hoods" position
Narrower bars fundamentally change upper body mechanics in the drops and on the hoods. The physiology and the impact are explained below:
Tricep and Lat Engagement:
- With narrower bars, triceps engage more to stabilize arm position
- Lats activate to maintain scapular control and prevent “winging”
- This creates a more stable platform for power transfer vs. wider bars that rely more on deltoid engagement
This position shifts the load from the skeletal structure to the triceps and core. While it requires more conditioning, it places the rider in a “skier” silhouette that slices through the air much more efficiently than a wide, parachute-like stance.
Shoulder Position:
- Narrower bars allow shoulders to internally rotate and protract forward
- Creates a more “wrapped” position around the bars
- Reduces shoulder width by 2-4cm beyond just bar width reduction
The “Aero Hoods” Position:
- The “Tucks”: Narrow bars naturally encourage the “aero hoods” position (forearms horizontal, hands on the hoods).
- Modern narrow bar setup allows forearms to be nearly parallel (like on aerobars)
- Elbows can stack inside the hood profile
- Head position naturally drops forward, closing the “hole” between arms and torso
- Creates a pseudo-TT position while maintaining hood access for braking/shifting
Breathing considerations:
- Some riders report initial breathing restriction due to increased shoulder protraction
- Typically adapts within 2-4 weeks
- Core strength becomes more critical to maintain thoracic expansion
It was once thought that narrow bars restricted breathing by “closing off the chest.” Modern sports science has largely debunked this, showing that lung expansion isn’t significantly hindered at 36-38cm.

Impact on Handling and Sprinting Leverage
Handling Trade-offs
Stability at speed:
- Wider bars = longer lever arm for steering inputs (more stable at high speed)
- Narrower bars require more core engagement for straight-line stability
- Descending technical sections requires more active steering corrections
- Steering becomes much “quicker” or “twitchier.” Pros prefer this for diving into corners in a tight peloton, but it can feel nervous to a beginner.
Low-speed handling:
- Narrower bars actually improve maneuverability in tight peloton situations
- Easier to navigate through gaps and rider overlap
- Better for criteriums and tight corner sequences
Sprint Leverage
This is where the debate gets interesting:
Arguments FOR narrow bars in sprints:
- More compact position = better power transfer efficiency
- Less “dead space” leverage that wastes energy on bike rocking
- Modern sprint data shows narrow bars don’t reduce peak power output
Arguments AGAINST:
- Reduced leverage for bike throw at finish line
- Less stability when sprinting out of the saddle at max effort
- Harder to open up chest for maximum oxygen intake
The data:
- Studies show no significant difference in peak power output between 38-42cm bars
- Rider preference and adaptation matter more than raw leverage
- Sprint specialists (Cavendish, Ewan) still prefer 40-42cm, while all-rounders have gone narrower
Flare vs. No Flare: The Gravel Influence on Road
What is Flare:
Gravel racing introduced “flared” bars (where the drops are wider than the hoods) to the road world. “Flare” refers to handlebars that widen at the drops (measured at bottom of drops vs. hoods). Common gravel flared bards are speced at 40cm at hoods and 44cm at drops (4° per side flare). Some extreme gravel bars: 12-20° flare.
The Best of Both Worlds:
Many pros now use bars that are 36cm at the hoods (for aero cruising) but flare out to 40cm or 42cm in the drops (for stability and wrist clearance during sprints).
The Benefit:
This allows a rider to be “tiny” when riding in the wind but “wide” when they need control on technical descents.
Gravel Origins:
Flare provides drop width for control on rough terrain while narrow hoods for aerodynamics. These provide better clearance for bikepacking bags, and more leverage for technical descents and out-of-saddle climbing on loose surfaces.
Benefits for Road:
For road riding, wider drop position for descending stability. Narrow hoods for time in aero position. The flares are more ergonomic and provide better wrist angle in drops. Road specific bards try to compromise between aero gains and handling confidence.
Migration to Road:
Brands now offer “aero road” bars with subtle flare (2-4°). Examples: Zipp SL-70 Aero (4° flare), PRO Vibe Evo (flare options). Allows 38cm hoods width with 40cm drop width.
Drawbacks:
Flared bars can feel “weird” in transitions from hoods to drops. Flared bars are less useful for riders who rarely use drops. And flared bars add weight typically 10-30g vs. traditional bars. And for weight conscious road riders, this incremental weight gain might not be favorable.
Verdict:
Flared bars makes sense for riders who spend significant time in drops (descenders, aggressive riders). But they can be less relevant for flat terrain time-trialists or riders primarily on hoods. However, 2-4° flare is becoming the new standard for “modern road geometry”
How to Measure Your Ideal Width - Old School vs. New School
There are 2 ways to measure width – traditional old-school wisdom vs new methodologies.
Old School: The Bone Match
The traditional method was to measure from acromion to acromion (acromioclavicular joint to joint – the bony bumps on top of your shoulders). If you measured 40cm, you bought 40cm bars. This prioritized comfort and “open” breathing.
How it was measured:
- Stand naturally, measure bony point of shoulder to shoulder
- Most riders: 38-42cm
- Add 2cm for “comfort” = 40-44cm bars
Problems with this approach:
This method assumes that aerodynamics don’t matter, and doesn’t account for shoulder flexibility or riding position. This also ignores handlebar shape and hood placement geometry.
New School Method: Position-Based Width
The modern approach is to go as narrow as your flexibility and bike handling skills allow.
How it is measured:
1. Actual Hood Position Width
- Measure where hands naturally sit on hoods in riding position
- Use video analysis or have someone measure while riding
- Start Small: Subtract 2cm from your shoulder measurement as a starting point – most riders’ hands are 2-4cm narrower than bars when in aero position
2. Flexibility Assessment
- Can you comfortably hold 38cm bars in drops for 5+ minutes?
- Does your breathing feel restricted?
- Can you maintain this position without shoulder/neck tension?
- Test Stability: If you feel “twitchy” or unsafe on descents, the bars are too narrow for your current skill level.
- Check Wrist Clearance: Ensure that when you are in the drops, your forearms don’t hit the tops of the bars.
3. Discipline-Specific
- Time Trial/Triathlon: Start with shoulder width minus 4-6cm
- Road Racing/Crits: Shoulder width minus 2-4cm
- Endurance/Sportive: Shoulder width minus 0-2cm
- Gravel/Mixed: Consider flare options at shoulder width
4. The “Fist Test”
- In aero hood position, elbows bent 90°
- Can you fit two fists (side by side) between your forearms?
- If yes, go narrower
- If barely one fist, that’s your width
Practical Recommendation
Start your measurement process:
- Measure actual shoulder width (38-42cm for most)
- Subtract based on discipline and aero priority
- Test ride before committing (some shops have demo bars)
- Expect 2-4 week adaptation period
- Reassess after adaptation
The Compromise Position
- Most riders moving from 42cm → 38cm report best results
- 36cm works for smaller riders (<170cm) or pure aero focus
- 40cm is the “safe” middle ground for most applications
Red Flags to Go Wider:
- Shoulder pain after 1-hour rides
- Breathing feels constricted even after 4-week adaptation
- Handling feels sketchy at speed
- You’re primarily a sprinter or crit racer
The Bottom Line: Narrower Isn't Always Better
As we move into a new era of cycling tech, the transition to narrower bars proves that the most impactful upgrades are often those that reshape the rider rather than just the machine. The narrow handlebar trend offers legitimate aerodynamic benefits that can’t be ignored—3-8 watts at race speeds is significant. But cycling equipment decisions are never one-dimensional. The “right” bar width is the one that allows you to hold your most aerodynamic position comfortably for the duration of your efforts, while maintaining the control and confidence you need for technical sections and sprint finishes.
While the aerodynamic benefits of a 36cm or 38cm width are undeniable for those chasing podiums, the trend has reached a point where even the UCI has stepped in to regulate minimum widths for the sake of peloton safety. But for the everyday rider, the “New School” approach isn’t necessarily about choosing the narrowest bar available, but rather finding the specific width that optimizes their aerodynamic profile without compromising the leverage needed for confident descending and sprinting, and most important of all, rider safety.
Check out our The Rider’s Year 2026 page – it has every gravel event and training window mapped out — free to add to Google Calendar.
Happy Riding!
Related Cycling and Training Content
- Cycling Cadence
- Indoor Cycling for Winter Fitness
- Cross-Training Activities for Cyclists During the Off Season
For further cycling and training tips, you can also listen to the Ask The Pedalist podcast, where we discuss common cycling topics.
PEDAL MY WAY NEWSLETTER
Weekly training tips, cycling strategies, and fitness insights for sustainable performance.
No spam—just actionable guidance to help you train smarter.

Mukund Murali is the founder of Pedal My Way (pedalmyway.com), a cycling and fitness media brand reaching 50,000+ monthly visitors. He brings 20+ years of cycling experience spanning road, gravel, and mountain biking, with deep expertise in bike mechanics and repair. A CrossFit L1 and L2 certified trainer (2018–2023), Mukund combines strength training methodology with cycling performance to create evidence-based content for the everyday rider. He is the host of Ask The Pedalist podcast and creator of the PMW Fit workout app on Google Play.