Of the bikes I own, one has hydraulic disc brakes, one has mechanical disc brakes, and five have rim brakes. So it was essential for me to learn how to maintain all of these styles of brake to ensure safe riding for family and friends that would be using them. Some styles of brakes are easy to maintain, while others take some practice to start maintaining them yourself.
First, it’s essential to understand the different types of bicycle brakes. The two most common types of brakes are rim brakes and disc brakes.
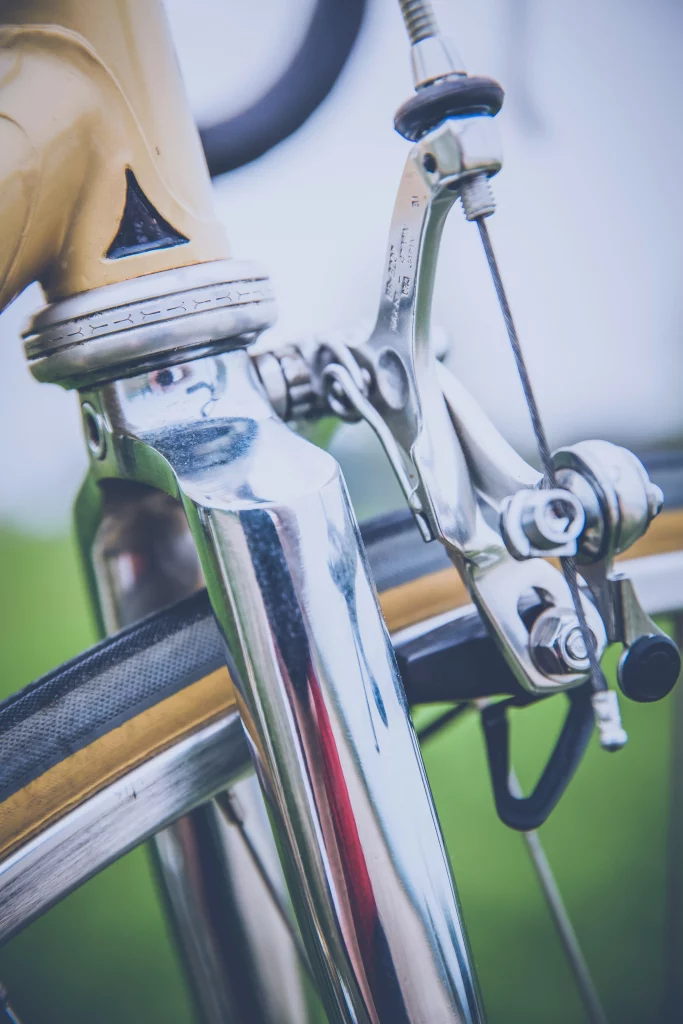
Rim Brakes
Rim brakes use rubber pads that grip the wheel rim to slow down or stop the bike.
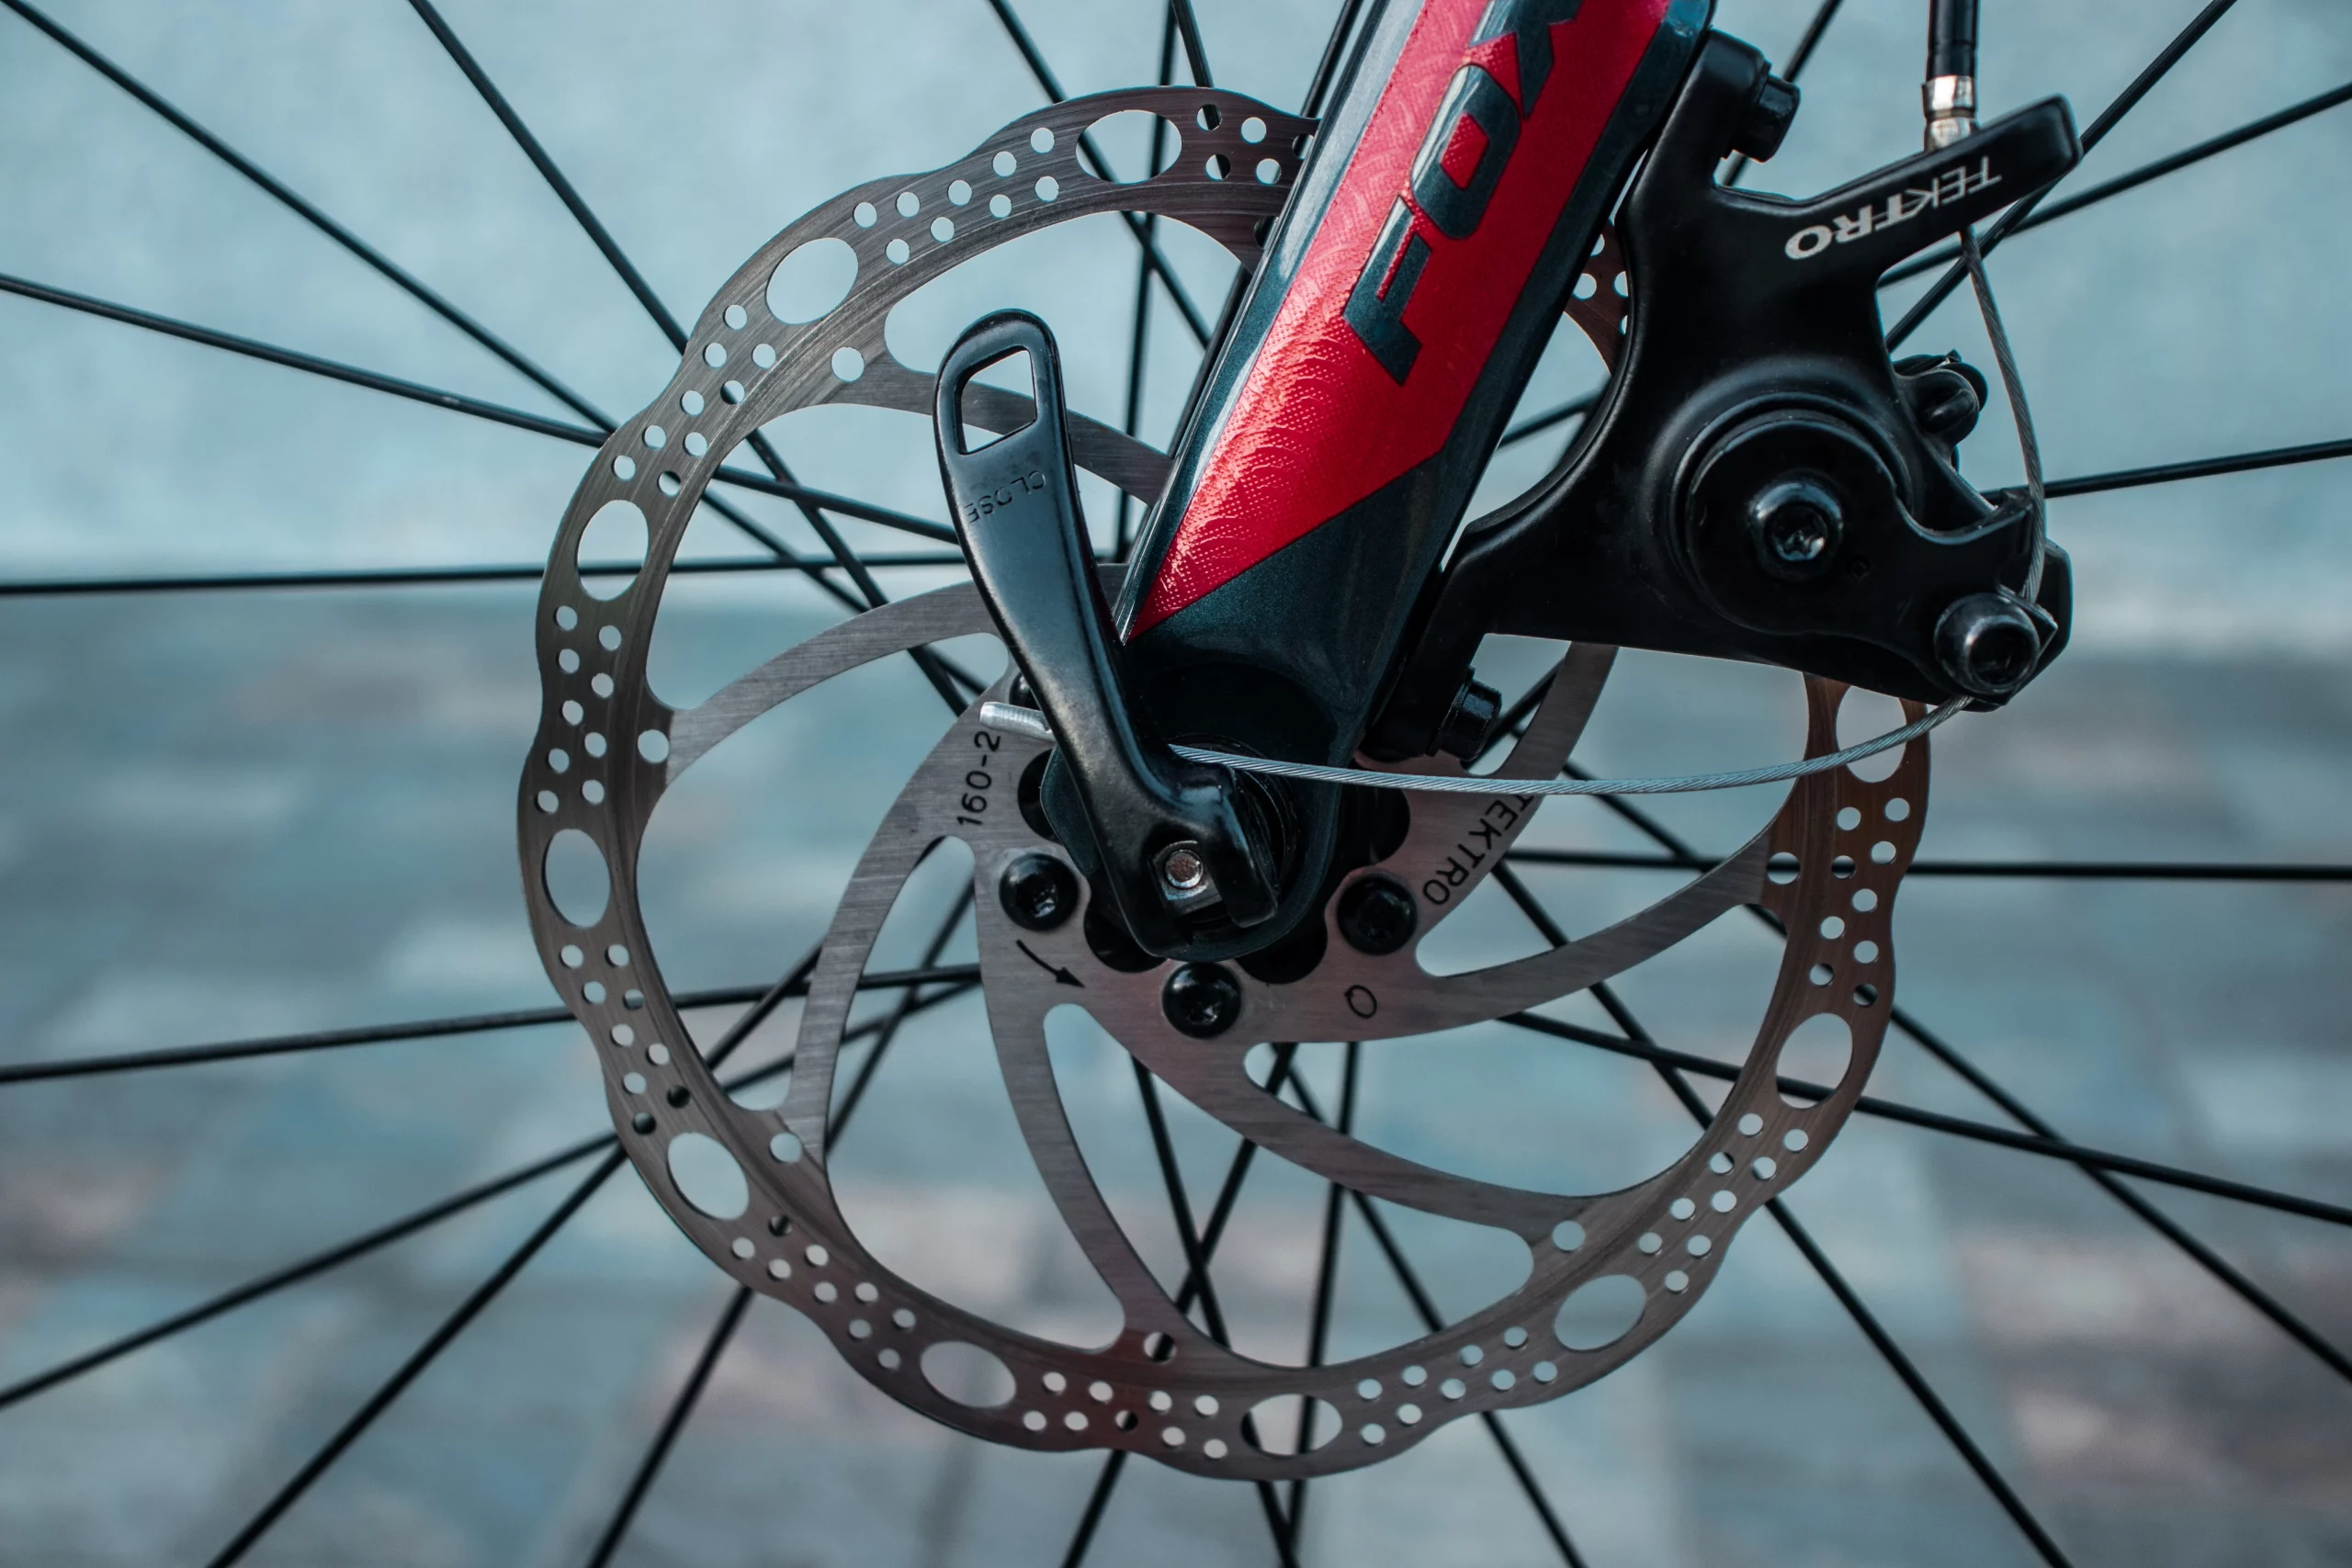
Disc Brakes
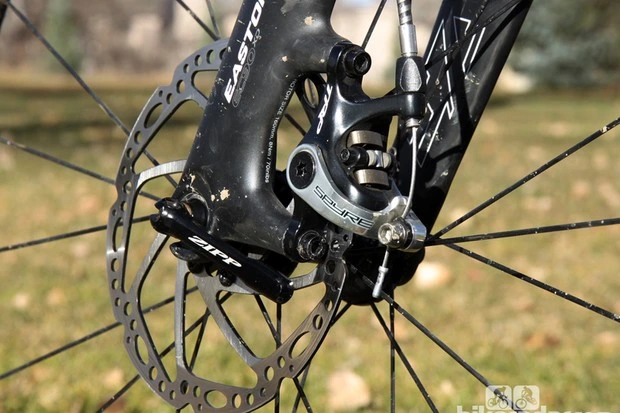
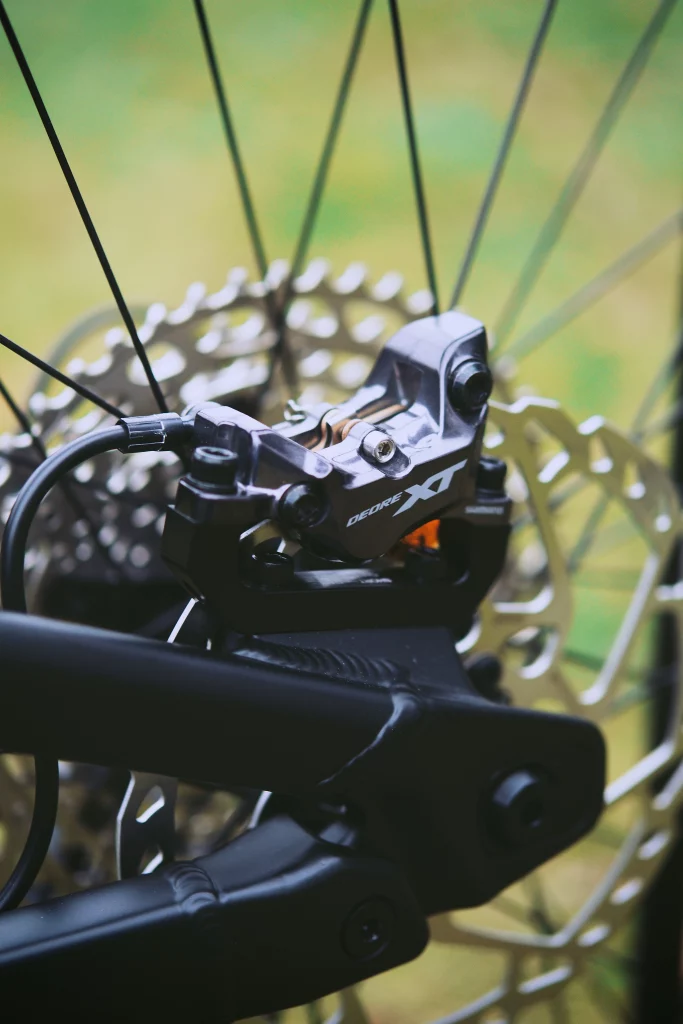
Disc brakes use a rotor attached to the wheel hub and a caliper that squeezes brake pads against the rotor to slow down or stop the bike.
There are numerous advantages and disadvantages to both brakes, and the best choice of braking mechanism for your bike comes down to personal preference. Though the bike industry is slowly moving towards disk brakes, there are still lots of bikes running rim-style brakes. In general, rim brakes are primarily used on entry-level mountain bikes and road bikes. Mountain bikes mostly have disk brakes, though some recent road bike models come with disc brakes.
The rim brakes’ advantage is the cheaper cost and ease of maintenance. The main disadvantage is its limited stopping power for downhill racing in mountain bikes, which is increasingly popular. Another disadvantage is rim brakes’ performance in wet conditions, where the rims are closer to the road and have higher chances of water impeding braking performance by getting between the rims and the brake pads.
Disc brakes perform better for road bikes because of their location. However, it’s important to consider the two varieties of disc brakes: hydraulic and mechanical disc brakes. Hydraulic disc brakes provide the best performance, but this high performance comes at a higher price to buy, install and maintain. Mechanical disc brakes are cable-actuated, and land between hydraulic disc brakes and rim brakes in terms of pricing and maintenance. Adjust Bike Brakes
How to Adjust Your Bike Brakes
Rim Brakes Adjustment
Tools Needed
To adjust your bicycle brakes, you’ll need a few tools, including:
-
- A set of Allen keys or a multi-tool with Allen keys
- A screwdriver (depending on the type of brakes you have)
- Brake cable cutters (optional)
Steps to adjust the brakes:
If you have trouble with slowing or stopping your bike, the brake pads might need to be cleaned out or replaced. The following steps are the same for both flat and drop handlebars.
- Check the brake pads: Make sure your brake pads are in good condition and have enough rubber. If they are worn out, replace them before adjusting the brakes.
- Locate the brake cable: The brake cable runs from the brake lever to the brake caliper. Locate the cable where it enters the brake caliper.
- Adjust the cable tension: Use an Allen key to turn the barrel adjuster on the brake caliper. Turn it clockwise to tighten the cable or counterclockwise to loosen it. Adjust the tension until the brake pads are close to the rim but not touching it.
- Check the brake pads’ alignment: Ensure the brake pads are aligned with the rim. Adjust the position of the brake pads if necessary, using an Allen key.
- Test the brakes: Squeeze the brake lever and check if the pads make contact with the rim. If they don’t make contact, adjust the cable tension further. If they make too much contact, loosen the cable tension.
- Repeat for the other brake: Repeat the same steps for the other brake.
Mechanical Disc Brake Adjustment
Adjusting a mechanical disc brake is similar in difficulty as a rim brake adjustment. Since the brake caliper and a brake rotor is involved, additional care should be taken to align the brake pads to endure the rotor has no contact with the brake pads.
Tools Needed:
-
- A set of Allen wrenches
- A Phillips head screwdriver
- A clean rag
- A pair of pliers (optional)
- Brake pads
Steps to adjust mechanical disc brakes:
- Check Your Brake Pads: The first step in adjusting your mechanical disc brakes is to check your brake pads. Make sure that they are not worn out and that they are properly aligned with the rotor. If your brake pads are worn out, you’ll need to replace them before continuing with the adjustment process.
- Adjust the Brake Caliper Position: To adjust the position of your brake caliper, you’ll need to use Allen wrenches. Loosen the bolts that hold the caliper in place and adjust the position of the caliper until it is centered over the rotor. Once the caliper is centered, tighten the bolts back up. Make sure that the caliper is not rubbing against the rotor.
- Adjust the Brake Cable Tension: To adjust the tension of your brake cable, locate the adjusting barrel on the brake lever. Turn the barrel clockwise to tighten the cable or counterclockwise to loosen it. Make sure that there is enough tension in the cable so that the brake pads make contact with the rotor when the lever is pulled.
- Adjust the Brake Pad Alignment: To adjust the alignment of your brake pads, use the Phillips head screwdriver. Loosen the bolt that holds the brake pad in place and align the pad so that it makes even contact with the rotor. Tighten the bolt back up once the pad is aligned. Repeat this process for the other brake pad.
- Check the Brake Lever Reach: The final step in adjusting your mechanical disc brakes is to check the reach of your brake lever. The reach is the distance between the brake lever and the handlebar. Adjust the reach so that it is comfortable for you to use. To adjust the reach, use the Allen wrenches to loosen the bolt that holds the brake lever in place. Adjust the position of the lever and tighten the bolt back up.
The instructions in this video give you the exact steps to follow to adjust mechanical disc brakes.
Hydraulic Disc Brakes Adjustment
Tools Needed
To adjust your bicycle brakes, you’ll need a few tools, including:
-
- A set of Allen keys or a multi-tool with Allen keys
- A screwdriver (depending on the type of brakes you have)
- Brake fluid and tools (different tools for Shimano vs SRAM vs other types of disc brakes)
Steps to adjust the brake pads and caliper:
- Check the brake pads: Make sure your brake pads are in good condition and have enough material. Disc brake pads come in metal or sintered material. If they are worn out, replace them before adjusting the brakes. If this doesn’t solve the problem, go to step 2 below.
- Locate the brake caliper: The brake caliper is attached to the bike frame or fork and holds the brake pads.
- Adjust the brake pads alignment: Loosen the bolts that hold the brake pads in place. Align the pads so that they are parallel to the rotor and centered on it. Tighten the bolts.
- Adjust the caliper position: Use an Allen key to loosen the bolts that hold the caliper in place. Move the caliper closer to the rotor but make sure it doesn’t rub against it. Tighten the bolts.
- Test the brakes: Squeeze the brake lever and check if the pads make contact with the rotor. If they don’t, adjust the caliper position further. If they make too much contact, loosen the caliper position.
- Repeat for the other brake: Repeat the same steps for the other brake.
Steps to change the brake fluids:
Changing the brake fluid is a technical process and requires a little more mechanical experience. This requires removing (bleeding) out the entire brake fluid and replacing it with fresh fluid, But this is not hard to do yourself if you follow the instructions. If this is your first time, make sure you follow the instructions and have the right tools.
Hydraulic Brakes on Flat Bars:
- For Shimano brakes on flat-bar bikes, follow the instruction video here.
- For SRAM brakes on flat-bar bikes, follow the instruction video here
Hydraulic Brakes on Drop Bars:
- For Shimano brakes on drob-bar bikes, follow the instructions here.
- For SRAM brakes on drob-bar bikes, follow the instructions here.
Tips for Maintaining Your Disc Brakes
Now that you know how to adjust your mechanical disc brakes, it’s important to know how to maintain them properly. Here are a few tips to help you keep your brakes in top condition:
-
- Clean your brakes regularly with a clean rag and some rubbing alcohol.
- Check your brake pads regularly for wear and replace them when necessary.
- Keep an eye on your brake
Additional Bicycle Brake Tips
Here are some additional tips to keep in mind when adjusting your bicycle brakes:
-
- Always wear safety gear, including a helmet, when riding your bike.
- Clean your brakes regularly to ensure maximum performance.
- Check your brake pads regularly for wear and replace them if necessary.
- Test your brakes before every ride to ensure they are functioning correctly.
- If you’re unsure about how to adjust your brakes or you’re not comfortable doing it yourself, take your bike to a professional bike mechanic for assistance.
- When adjusting your brakes, make small adjustments at a time and test your brakes frequently to avoid making the brake too tight or loose.
Conclusion
Adjusting your bicycle brakes is an essential maintenance task for every cyclist and will keep your bike functioning safely for upcoming rides. Whether you have rim brakes or disc brakes, the process of adjusting them is relatively simple, and with the right tools and some patience, you can do even the most complex tasks yourself. Remember to check your brakes regularly and seek professional bike shop help if you’re unsure about how to adjust them.
A well-functioning set of brakes not only ensures you stop quickly but also provides a stress-free riding experience. So, follow these simple steps and enjoy a safe and comfortable ride on your bike.
I hope you found this bike brake adjustment guide useful. Check out my other biking posts for insight into my other bike upgrade projects.
Mukund Murali is the founder of Pedal My Way (pedalmyway.com), a cycling and fitness media brand reaching 50,000+ monthly visitors. He brings 20+ years of cycling experience spanning road, gravel, and mountain biking, with deep expertise in bike mechanics and repair. A CrossFit L1 and L2 certified trainer (2018–2023), Mukund combines strength training methodology with cycling performance to create evidence-based content for the everyday rider. He is the host of Ask The Pedalist podcast and creator of the PMW Fit workout app on Google Play.