PEDAL MY WAY NEWSLETTER
Weekly training tips, cycling strategies, and fitness insights for sustainable performance.
No spam—just actionable guidance to help you train smarter.
Table of Contents
How to Check the Wheels
- Inspecting wheels and tires: Start by visually inspecting the wheels for any signs of damage, such as dents, cracks, or loose spokes. Check the wheel bearings for smooth rotation and any signs of wear or damage. Check for wear and tear – Look for cracks, cuts, or bald spots on the tread.
- Cleaning: Remove any dirt, grime, or debris from the wheels using a soft brush, warm water, and bike-specific cleaner or mild soap. Be sure to clean the brake surface, spokes, and hub area thoroughly.
- Truing: Check the wheel’s trueness by spinning it and observing any side-to-side wobbling. If the wheel is not true, use a spoke wrench to adjust the spoke tension, working in small increments and gradually bringing the wheel back into alignment.
- Adjusting Wheel Bearings: For cup-and-cone bearings, check the hub for any play or binding. Adjust the cone nuts and locknuts accordingly, making sure the hub spins smoothly with minimal resistance and no play. Ensure quick releases or thru-axles are secure; loose axles can cause instability.
- Checking Spoke tension: Check the spoke tension by squeezing pairs of spokes or using a spoke tension meter. Adjust the tension as needed, ensuring that the spokes are tight and evenly tensioned.
- Adjusting Brake pads: Ensure that your brake pads are properly aligned with the wheel’s brake surface, and adjust them if necessary. Replace worn-out brake pads to maintain optimal braking performance.
- Lubricating: Lubricate the hub bearings with a high-quality bicycle bearing grease. Apply a light coating to the spoke nipples to prevent corrosion and make future adjustments easier.
- Checking Tires: Inspect your tires for any cuts, bulges, or excessive wear. Ensure proper tire inflation to maintain grip and reduce the risk of flats. Check tire pressure – Inflate to the recommended PSI (printed on the sidewall). Cold weather may have caused pressure loss.
Look for embedded debris – Small glass shards or thorns can cause slow leaks. - Scheduling maintenance: Perform regular wheel maintenance throughout the spring season, especially if you ride frequently or in harsh conditions. Inspect and clean the wheels after every ride, and perform more in-depth maintenance, such as truing and bearing adjustments, as needed.
How to Clean the Frame and Spokes
Regularly cleaning your bike frame and spokes not only keeps your bicycle looking great but also helps maintain its performance and longevity.
Here’s a step-by-step guide to help you clean your bike frame and spokes effectively:
Materials Needed:
- Bike-specific cleaner or mild soap
- Warm water
- Bucket or large container
- Soft cloth, sponge, or brush
- Toothbrush (for hard-to-reach areas)
- Hose or water source
- Towels or cloths for drying
Cleaning the Frame:
- Begin by rinsing the bike frame with water to remove any loose dirt or debris.
- Fill a bucket with warm water and add a bike-specific cleaner or mild soap. Mix the solution until it becomes slightly sudsy.
- Using a soft cloth, sponge, or brush, gently scrub the bike frame, paying extra attention to areas with stubborn dirt or grime. For tight spots or hard-to-reach areas, use a toothbrush.
- Rinse off the soapy solution with water, ensuring all the suds and residue are washed away.
- Dry the frame using towels or cloths to prevent water spots and rust.
Cleaning the Spokes:
- Wet the spokes with water to help loosen any debris or grime.
- Dip a soft cloth or sponge into the soapy solution and carefully clean the spokes one by one, ensuring you cover both sides. Pay extra attention to the areas near the hub and rim, where dirt tends to accumulate.
- Rinse the spokes thoroughly with water to remove all soap residue.
- Dry the spokes with a towel or cloth to prevent rust or corrosion.
Bonus Tips:
- If your bike has disc brakes, avoid getting oil or soap on the rotors.
- Clean your bike more often in wet or muddy conditions.
- Use a toothbrush to clean around bolts and tight spots.
Remember to clean your bike frame and spokes regularly, especially after riding in wet or muddy conditions. Regular maintenance will help keep your bicycle looking its best and functioning at peak performance.
How to Check Your Bike Drivetrain
Regularly checking your bike’s drivetrain is essential for maintaining optimal performance and extending the lifespan of your components.
The drivetrain consists of the chain, chainrings, cassette, derailleurs, and shifters. Here’s a step-by-step guide on how to inspect and maintain each component:
Materials Needed:
- Chain wear indicator tool
- Clean rag or cloth
- Degreaser or bike-specific cleaner
- Lubricant (wet or dry, depending on your riding conditions)
Inspecting and Cleaning the Chain:
- Check for chain wear using a chain wear indicator tool. Replace the chain if it is excessively worn to prevent damage to the cassette and chainrings.
- Clean the chain with a rag and degreaser, rotating the pedals to move the chain through the cloth. Be sure to remove any dirt, grime, or debris from the chain links and rollers.
Inspecting the Cassette and Chainrings:
- Visually inspect the cassette and chainrings for excessive wear or damage, such as worn-down teeth, bent teeth, or broken teeth. Replace the components if necessary.
- Clean the cassette and chainrings with a rag and degreaser, ensuring to remove any dirt or debris from the teeth and surfaces.
Checking the Derailleurs and Shifters:
- Inspect the derailleur for any damage or debris buildup, and ensure the jockey wheels are clean and spin smoothly. Lubricate the pivot points with a light lubricant if needed.
- Check the shifter function by shifting through each gear and ensuring smooth and accurate shifting. If shifting is not smooth, adjust the cable tension or consider replacing the cables and housing.
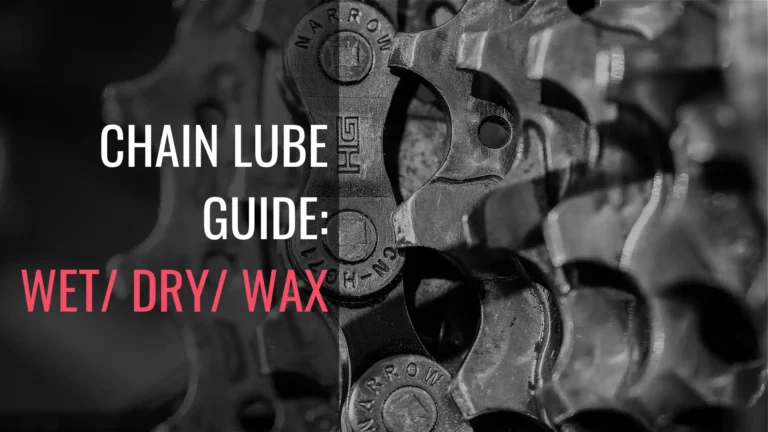
Lubricating the Chain:
- After cleaning and drying the chain, apply a lubricant suitable for your riding conditions. Use a wet lube for wet or muddy conditions, and a dry lube for dry or dusty conditions.
- Wipe off any excess lubricant from the chain to prevent dirt buildup and improve shifting performance.
Check the Bottom Bracket and Cranks
- Spin the cranks- they should rotate smoothly without creaking.
- Check for side-to-side movement- loose cranks could indicate a worn bottom bracket.
How to Tighten Bike Bolts
Keeping your bike’s bolts tight and secure is essential for maintaining its structural integrity and ensuring a safe ride.
Here’s a step-by-step guide on how to tighten bike bolts effectively:
Materials
- Appropriate-sized Allen wrenches or torque wrenches
- Threadlocker (optional)
- Start by inspecting your bike and identifying all the bolts that need to be checked and tightened, such as those on the
- stem
- handlebars
- seatpost
- crankset
- pedals
- wheel skewers (of not a thru-axle or quick-release)
- Using the appropriate-sized Allen wrench or torque wrench, tighten each bolt to the manufacturer’s recommended torque specification. You can usually find this information in your bike’s manual or on the manufacturer’s website.
- For bolts that tend to loosen frequently, consider applying a small amount of threadlocker, which is a liquid adhesive that prevents bolts from coming loose. Be sure to use a removable threadlocker and follow the manufacturer’s instructions for proper application.
- After tightening all bolts, double-check each one to ensure they are secure and not over-tightened.
Ensure you check the bolts periodically, as they directly ensure your safety. A well-tightened bike is a safe and smooth-riding bike!
Tips for Checking Your Saddle
- Inspect for Damage: Regularly inspect your saddle for any signs of wear, tear, or damage, such as cracks, loose stitching, or torn leather. Press down on the saddle to ensure the padding isn’t too compressed or uneven. Look for bends, cracks, or rust on the metal rails that attach to the seatpost. A damaged saddle may not provide adequate support and can lead to discomfort during your ride.
- Check Saddle Position: Ensure that your saddle is positioned correctly for your body and riding style. The saddle should be level and its height should allow for a slight bend in your knee when the pedal is at the bottom of the stroke. A level saddle is best for comfort; tilting forward or backward can cause discomfort.
- Adjust Seatpost Clamp: Make sure the seatpost clamp is secure and holding the saddle in place properly. Over-tightening the clamp can damage the seatpost or saddle rails, while under-tightening can lead to a wobbly saddle.
- Clean and Condition: Clean your saddle regularly with a damp cloth and mild soap, taking care not to saturate the saddle with water. For leather saddles, use a leather conditioner to keep the material supple and prevent cracking.
- Lubricate Seatpost (if needed): For metal seatposts apply a small amount of grease to prevent seizing. For carbon seatposts use carbon assembly paste instead of grease. (Check the manufacturer’s recommendation before applying any products)
- Replace if Necessary: If your saddle is damaged, worn out, or doesn’t provide the necessary comfort and support, it may be time to replace it. Research different saddle options that cater to your riding style, preferences, and body type. Visit a local bike shop to try out various models and consult with experienced staff for recommendations.
- Check saddle compatibility: When choosing a new saddle, make sure it’s compatible with your seatpost and bike type. Most saddles are available in various rail materials and diameters, so ensure the saddle rails fit your seatpost clamp.
- Set saddle height and position carefully: Proper saddle height and fore/aft position can improve pedaling efficiency and comfort. Make small adjustments and test ride your bike to find the optimal settings.
- Invest in a quality saddle: A high-quality, well-fitted saddle can significantly enhance your riding experience. While these saddles may be pricier, the improved comfort and durability are often worth the investment.
- Consider saddle accessories: If you’re experiencing discomfort or need additional support, consider accessories such as padded shorts, chamois cream, or a saddle cover. These products can help alleviate pressure points and reduce friction during your ride.
Bike Brake Prep
Ensuring your bike’s brakes are properly prepared and maintained is crucial for your safety on the road. Here’s a step-by-step guide on bike brake prep:
- Inspect Brake Pads: For rim brakes, check for wear lines—replace if worn past the indicator. Replace them if they’re worn down, cracked, or have absorbed oil or grease. For disc brakes, look for thin or unevenly worn pads; replace if less than 1mm thick. For all brake types, ensure even contact – the pads should align properly with the rim or rotor.
- Adjust Brake Alignment: Make sure the brake pads are centered on the rim and not rubbing against the tire or the rim sidewall. Adjust the pad position as needed by loosening the bolt, repositioning the pad, and retightening the bolt. For disc brakes, clean rotors with isopropyl alcohol—avoid touching them with bare hands. Ensure rotors are not bent; straighten slightly with a rotor truing tool if needed.
- Check Brake Lever Travel: For rim brakes, squeeze the brake levers and observe the brake pad movement. The pads should engage the rim before the lever reaches the handlebar. Adjust the cable tension if needed by turning the barrel adjuster or by tightening or loosening the cable pinch bolt. For Disc Brakes ensure calipers are centered over the rotor and don’t rub.
- Check Brake Cables or Hydraulic Lines: For cable brakes, check for frayed, corroded, or stretched cables. Apply a small amount of lubricant to the cable housing for smooth movement. For hydraulic brakes, check for leaks or air bubbles in the system. If brakes feel spongy, they may need to be bled.
- Inspect and Lubricate Brake Cables: Ensure the brake cables are not frayed or damaged. If they are, replace them.
- Test Brakes Before Riding: When you squeeze the levers the brakes should engage quickly without excessive travel. Check for rubbing or uneven braking.
Proper brake maintenance ensures a safe and smooth spring riding experience!
Ready to Roll: Ride Into Spring With Confidence
PEDAL MY WAY NEWSLETTER
Weekly training tips, cycling strategies, and fitness insights for sustainable performance.
No spam—just actionable guidance to help you train smarter.